Advantage of using Spring Stored Procedure :
Some of the value-add provided by Spring's JDBC abstraction frameworkare below:
Step by Step tutorial for writing and running a spring stored procedure example with eclipse IDE.
Some of the value-add provided by Spring's JDBC abstraction frameworkare below:
- Define connection parameters
- Open the connection
- Prepare and execute the statement
- Set up the loop to iterate through the results (if any)
- Process any exception
- Handle transactions
- Close the connection
- Spring takes care of all the grungy, low-level details that can make JDBC such a tedious API to develop against.
Step by Step tutorial for writing and running a spring stored procedure example with eclipse IDE.
1) Goto Eclipse > Help > Eclipse Marketplace > click "Popular" tab
Under “Popular” tab install Spring IDE
 |
| Click on image to zoom |
2) Create a new Spring Project as shown below
 |
| Click on image to zoom |
3) Give the name of the new spring class as in below screen and click “Finish”
 |
| Click on image to zoom |
4) Following spring directory structure will be created by eclipse
 |
| Click on image to zoom |
5) Right click on the project > select properties > Java Build Path > libraries
Add all the spring libraries jars in the Build Path
 |
| Click on image to zoom |
6) Now in the src folder create a java class as below
 |
| Click on image to zoom |
7) Give the package name and the class name and click “Finish”
 |
| Click on image to zoom |
8) Below class structure is created now write your code as in example Fig. 1

package com.springsrc;
import java.sql.Types;
import java.util.HashMap;
import java.util.Iterator;
import java.util.List;
import java.util.ArrayList;
import java.util.Map;
import javax.sql.DataSource;
import org.springframework.context.ApplicationContext;
import org.springframework.context.support.ClassPathXmlApplicationContext;
import org.springframework.jdbc.core.SqlParameter;
import org.springframework.jdbc.core.SqlReturnResultSet;
import org.springframework.jdbc.datasource.DriverManagerDataSource;
import org.springframework.jdbc.object.StoredProcedure;
import org.springframework.util.CollectionUtils;
/**
* SpringCallStoredProc provides the Spring implementation with Stored Procedure
* @author ramantechnicaltutorial@gmail.com
* @version 1.0
**/
public class SpringCallStoredProc extends StoredProcedure{
public static void main(String[] args) {
ApplicationContext appCtx = new ClassPathXmlApplicationContext("springbean.xml");
DataSource dataSource = (DataSource) appCtx.getBean("dataSource");
SpringCallStoredProc callProc = new SpringCallStoredProc();
callProc.testDBConnection(dataSource);
System.out.println("Stored Procedure executed successfully");
}
void testDBConnection(DataSource dataSource) {
/* To connect to the SYBASE through Spring we can use either
* org.apache.commons.dbcp.BasicDataSource or DriverManagerDataSource
* the only important thing is to add the jconnect jar of SYBASE in the
* build path of the project as this jar contains the SYBASE driver
* build path of the project as this jar contains the SYBASE driver
* */
MyStoredProcedure sproc = new MyStoredProcedure(dataSource);
Map results = sproc.execute(4);
/* printMap(results);*/
List employees = (ArrayList) results.get("Employees");
if (!CollectionUtils.isEmpty(employees)) {
/* Print the Employee id retrieved from procedure*/
System.out.println("Employee Id retrieved from Stored Proc : "+ ((Employee)employees.get(0)).getId());
}
}
private class MyStoredProcedure extends StoredProcedure {
private static final String PROC_NAME = "proc_sper_batch_details";
public MyStoredProcedure(DataSource ds) {
super(ds,PROC_NAME);
setDataSource(ds);
declareParameter(new SqlParameter("4", Types.INTEGER));
declareParameter(new SqlReturnResultSet("Employees", new EmployeeMapper()));
compile();
}
public Map execute(int val) {
/* Pass input parameters Value*/
Map<String, Object> parameters = new HashMap<String, Object>(1);
parameters.put("4", val);
return execute(parameters);
}
}
private static void printMap(Map results) {
for (Iterator it = results.entrySet().iterator(); it.hasNext(); ) {
System.out.println(it.next());
}
}
}
Fig. 1
9) Similarly create an Employee class as in Fig. 2 and EmployeeMapper class as in Fig. 3.
package com.springsrc;
public class Employee {
private long id;
private String contactname;
private String orgname;
public long getId() {
return id;
}
public String getContactname() {
return contactname;
}
public String getOrgname() {
return orgname;
}
public Employee(long id, String contactname, String orgname) {
this.id = id;
this.contactname = contactname;
this.orgname = orgname;
}
}
Fig. 2
package com.springsrc;
import java.sql.ResultSet;
import java.sql.SQLException;
import org.springframework.jdbc.core.RowMapper;
public class EmployeeMapper implements RowMapper{
public Object mapRow(ResultSet rs, int arg1) throws SQLException {
Employee emp = new Employee(rs.getLong("NUMBER"), rs.getString("CONTACT_NAME"), rs.getString("org_Name"));
return emp;
}
}
Fig. 3
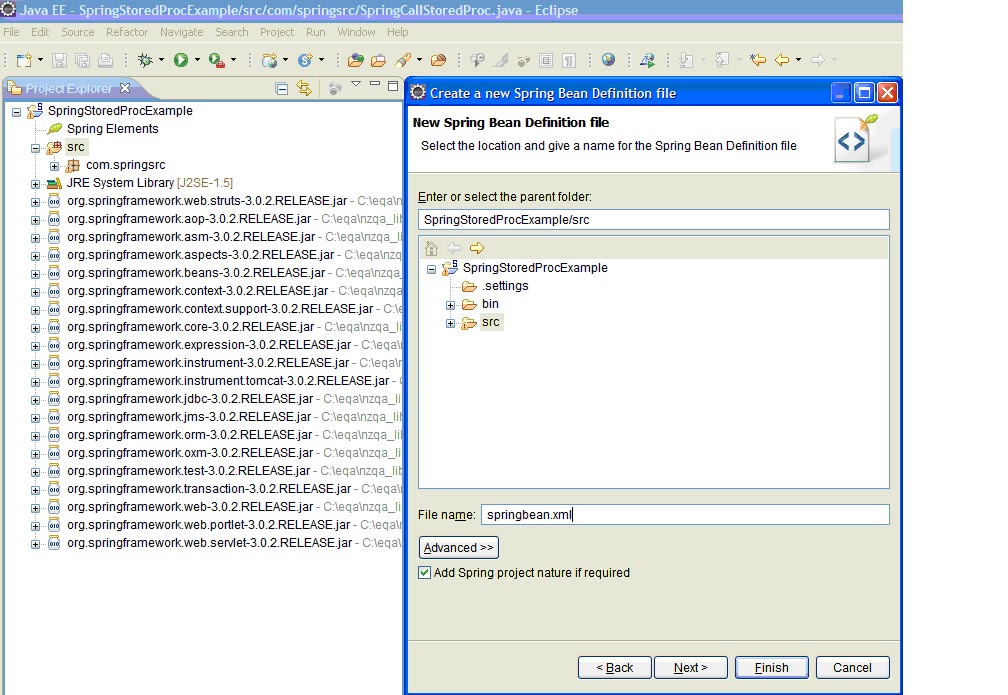
10) Now create Bean configuration File. Right click on the peoject “src” and select “Spring Bean Configuration File”, give the name as “springbean.xml” and click “Finish” as shown below.

11) Define the bean properties in springbean.xml as in Fig.4
<?xml version="1.0" encoding="UTF-8"?>
<beans xmlns="http://www.springframework.org/schema/beans"
xmlns:xsi="http://www.w3.org/2001/XMLSchema-instance"
xsi:schemaLocation="http://www.springframework.org/schema/beans http://www.springframework.org/schema/beans/spring-beans.xsd">
<bean id="dataSource" class="org.apache.commons.dbcp.BasicDataSource" destroy-method="close">
<property name="driverClassName" value="com.sybase.jdbc3.jdbc.SybDriver"/>
<property name="url" value="jdbc:sybase:Tds:devase01:5000/database_web"/>
<property name="username" value="eqa_user_dev"/>
<property name="password" value="password"/>
</bean>
<bean id="jdbcTemplate" class="org.springframework.jdbc.core.JdbcTemplate">
<property name="dataSource" ref="dataSource"/>
</bean>
</beans>
Fig.4
12) We have completed the coding part, now to build and run the example add the below jars.
- Spring framework jars (Download from site http://www.springsource.org/download)
- \apache\commons\dbcp\1_4\lib\commons-dbcp.jar (Download from site http://commons.apache.org/dbcp/download_dbcp.cgi )
- \apache\commons\logging\1_0_3\core\commons-logging.jar(Download from site http://commons.apache.org/logging/download_logging.cgi)
13) Finally to run the stored procedure example right click on “SpringCallStoredProc” class and run as Java Application as shown below.

14) Eclipse Console retrieves the result from stored procedure and prints the desired output as shown below.

Explanation of Code
org.springframework.jdbc.object
org.springframework.jdbc.object
Class StoredProcedure
java.lang.Object
  org.springframework.jdbc.object.RdbmsOperation
      org.springframework.jdbc.object.SqlCall
          org.springframework.jdbc.object.StoredProcedure
1 comment:
Spring Stored Procedure Tutorial
Post a Comment